Making An Angled Roof In Revit

Revit Tutorials Roofs Youtube
Autodesk Revit Architecture Creating A Sloped Roof Youtube

Roof Cutoff Level Youtube

Solved Slope On Roof Created On Mass Face Autodesk Community Revit Products

Revit Sloped Beam System Cadclip Youtube

Revit Structure Sloped Flat Roof Cadclips Youtube

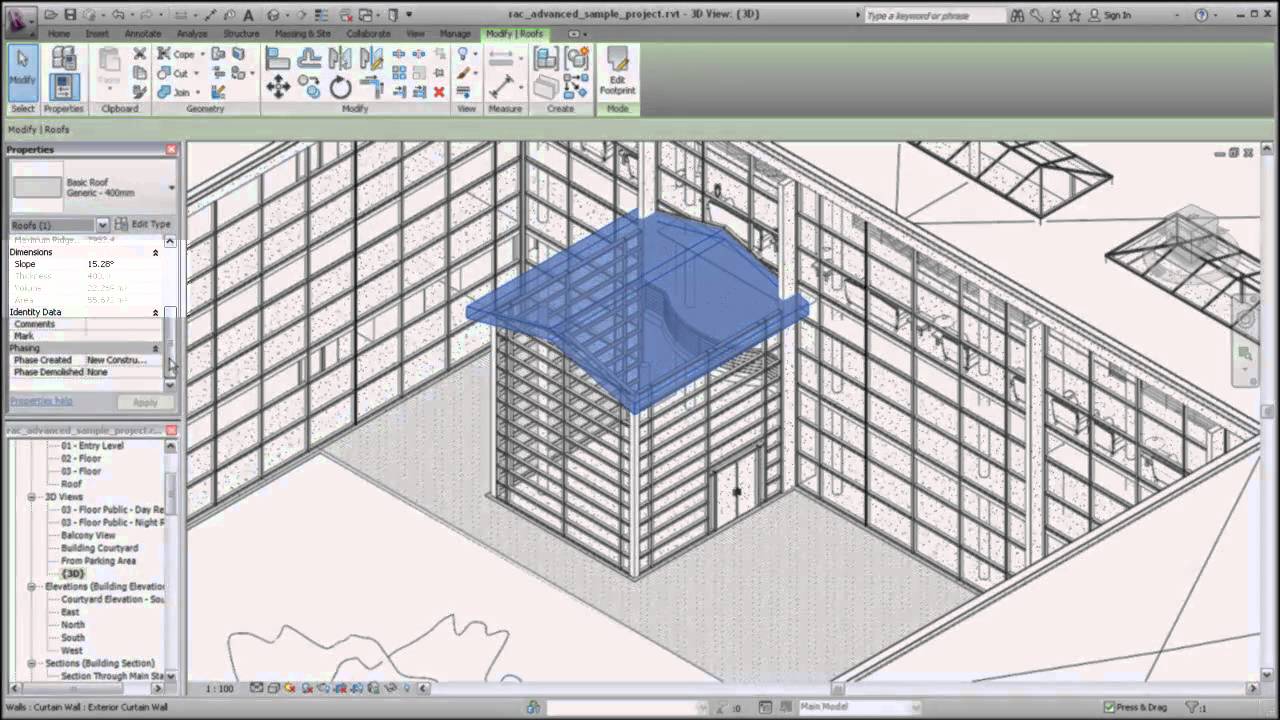
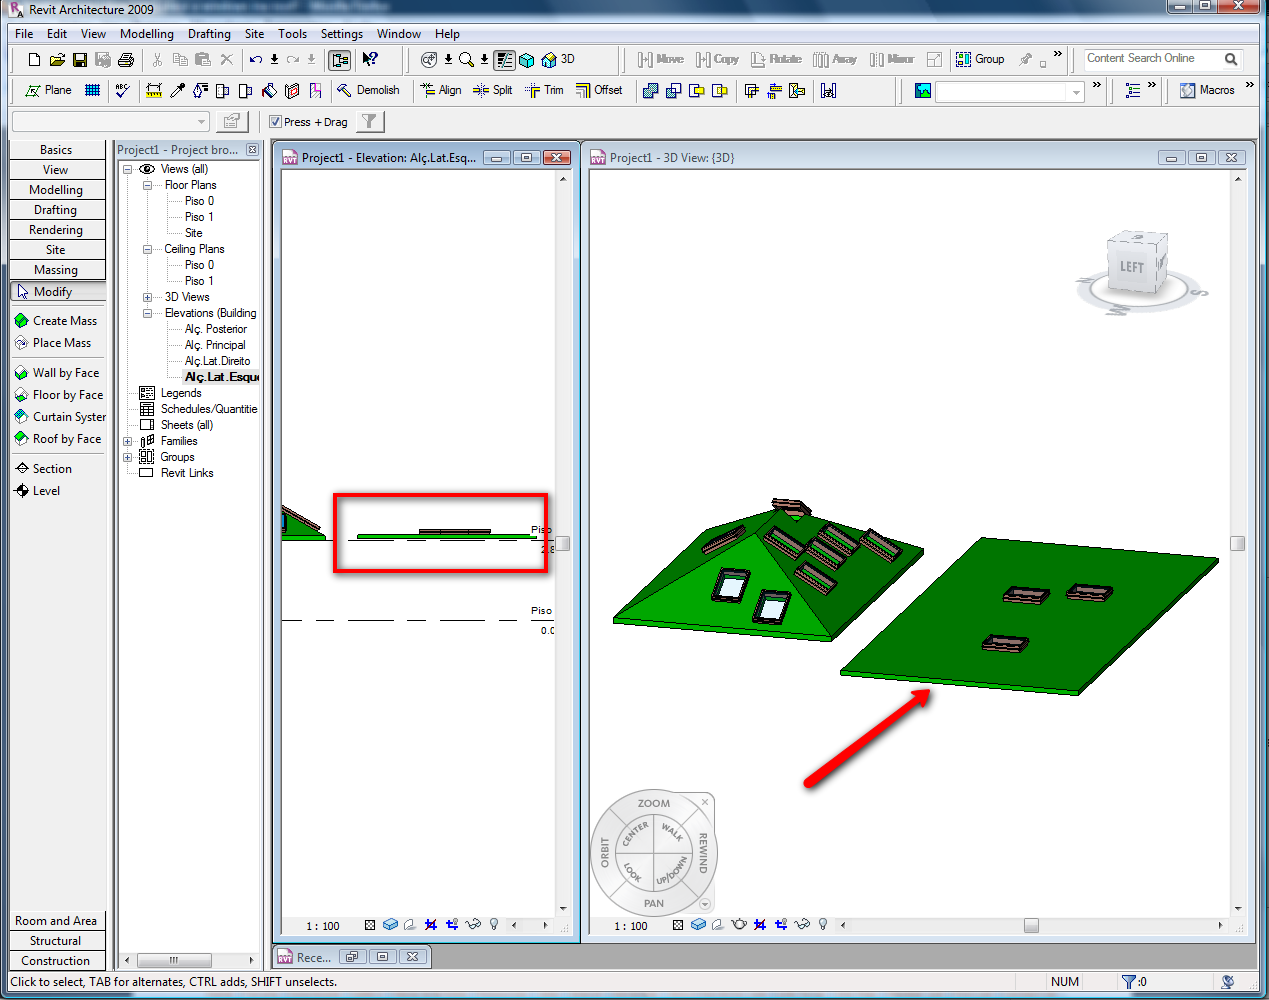
2 modify properties to adjust roof slope.
Making an angled roof in revit.

Creating Complex Roof In Revit Architecture Hip Roofs Youtube

Create A Sloped Ceiling Revit Products 2016 Autodesk Knowledge Network

Solved Revit Sloping A Gable Roof Autodesk Community Revit Products

Revit Roof Basics 04 Intersect By Roof Join Cadclips Youtube
Revitcity Com Please Help Revit 2011 Creating A Single Sloped Roof
Revit Sloped Glazing Youtube

Revit Part 1 Architecture 2010 Sloping Eyebrow Dormer Cadclip Youtube

Revit Roof Slope Arrow

Creating Sloped Beam In Revit Revit Lt Youtube

10 Common Roof Shapes Modeld In Revit Tutorial Youtube
Video Shape Editing Roof And Floor Slabs Revit Products 2019 Autodesk Knowledge Network

Create Roof Trusses With Purlins In Revit Youtube

Revit Roof Cleaning Up Overlapping Roofs Youtube

Flat Roofs In Revit Tutorial Youtube

Revit Roof Tip 1 Remove Slope To Create Flat Roof Youtube

Revit 2017 Cool Gable Roof Tip Cadclip Youtube

3 Complex Roof Shapes In Revit Youtube

Solved Circular Building Woes Pitched Circular Flat Roof Doors Copying And Pasting Autodesk Community Revit Products
Https Encrypted Tbn0 Gstatic Com Images Q Tbn 3aand9gcqt Jag1pa Hofhz 59fqg8i0feamtfelr0xlmsrdq6chiqvxbg Usqp Cau

Advanced Revit Architecture 2013 Tutorial Make Pitched Roof Youtube

Adding Dormer Window To A Sloping Roof Youtube

Revit Tutorial Pitched Roof With Central Courtyard Youtube

About Editing Floor And Roof Shape Revit Products 2019 Autodesk Knowledge Network

How To Create A Sloped Work Plane In Revit Autodesk Community Revit Products

Solved Best Practice For Tapered Roof Or Floor Autodesk Community Revit Products

Drawing A Dormer In Revit Youtube
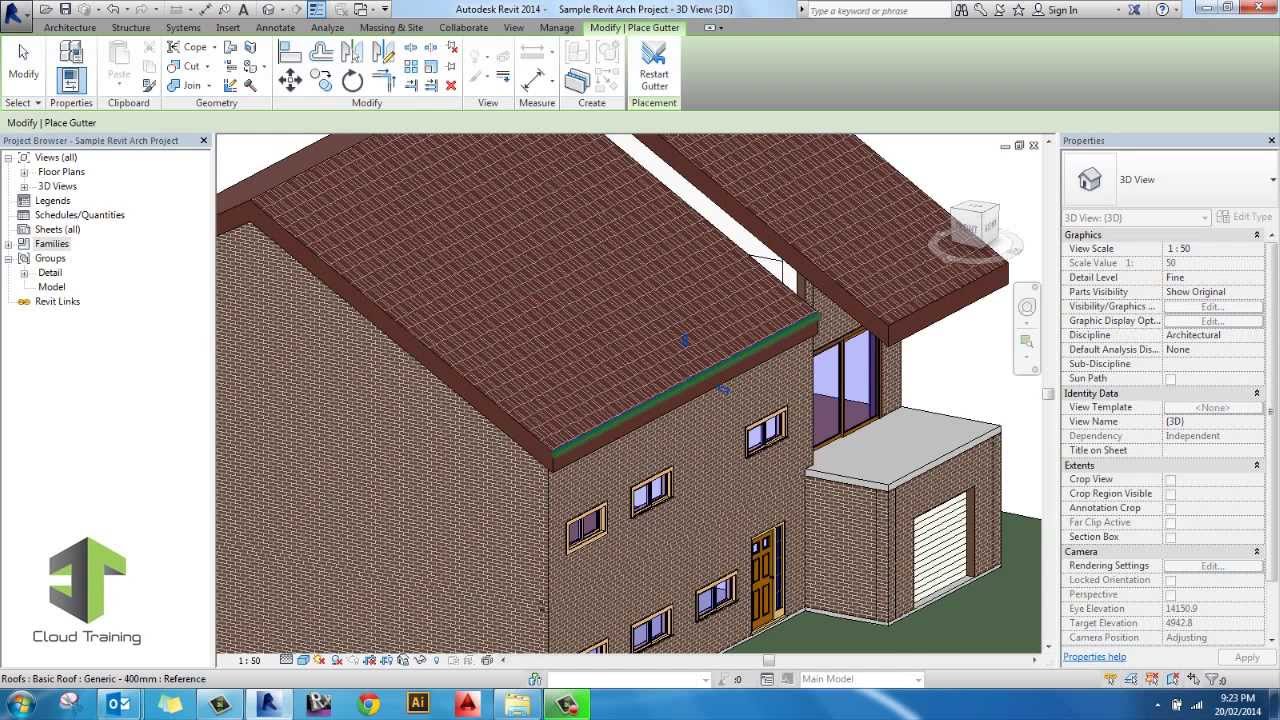
Solved Model Roof Gutter Autodesk Community Revit Products

Autodesk Revit Corrugated Sheeting Youtube

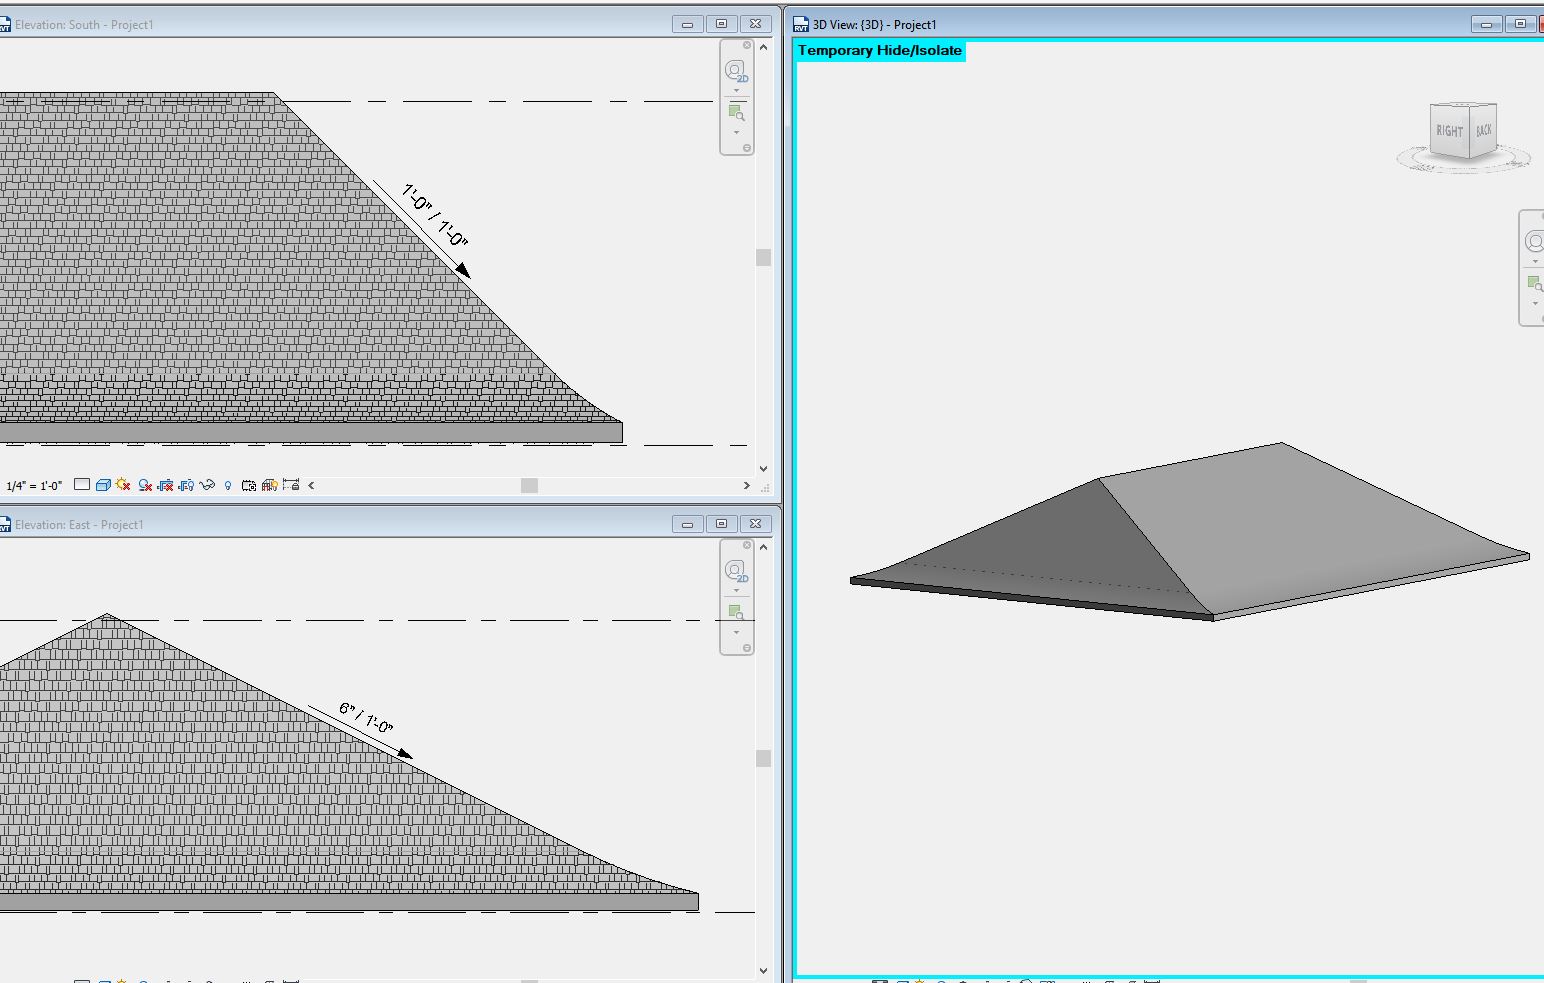
Create A Roof Slope Using Slope Arrows Revit Lt Autodesk Knowledge Network

Autodesk Revit Complex Roof Floor Shape Youtube

Purlins On Curved Roof Youtube
Solved Roofs With Dual Slopes And Curved Swoops At The Wall Edge Autodesk Community Revit Products

Revit Roofs 8020 Bim

Revit Roof Tutorial Revit Curved Roof Youtube

Revit Adding A Curtain Wall On A Floor Or Roof Cadtechseminars Com Youtube
Https Portal Imaginit Com Portals 0 Whitepapers Imaginit New Wp Revitroofs Pdf
Revitcity Com Gutter S On A Slope Revit 2010

Revit How To Model A Sloped Roof Soffit Roof Soffits Roof Replacement Cost Roof Problems
Video Create A Dormer Revit Products 2020 Autodesk Knowledge Network

Creating Complex Roofs In Revit 2014 Building Information Modeling Revit Architecture Roof
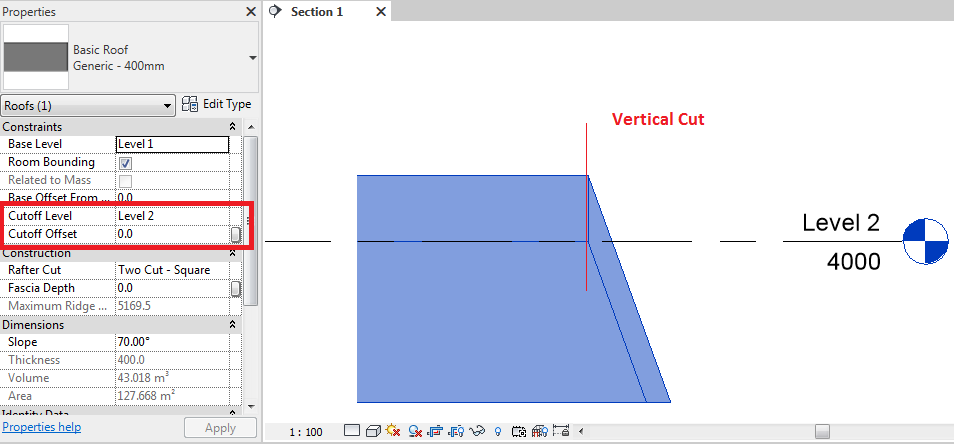
Cutoff Level Roof Behavior In Revit Revit Products 2018 Autodesk Knowledge Network

Revit Massing A Curved Bell Shaped Roof Youtube
Revitcity Com How Can I Place A Windows Ina Roof
Https Encrypted Tbn0 Gstatic Com Images Q Tbn 3aand9gcrecaqkrc4416bna50tp5w5n4x Ougybgfbvflsfradq7a7jopp Usqp Cau
Source : pinterest.com
